Macless Haystack for Findmy Flipper Setup
Setup Macless Haystack for Findmy Flipper Setup
Disclaimer: I just describe the original instructions with my own words and added some screenshots and maybe some more steps for Windows and Linux (server) users.
What is macless-haystack?
This project tries to unify several projects for an easy-to-use and easy-to-setup custom FindMy network. The goal is to run a FindMy network without the need to own a real Mac or virtual Mac. Also you don’t have to install the mail plugin or openhaystack itself. (As needed by the original OpenHaystack project).
You can find the Project on Github Macless-Haystack
Foreword
In this tutorial, I will guide you step by step through the process of setting up a Macless Haystack Server on both Windows and Linux using Docker. I’ll point out any differences in the setup process for Windows as we go along.
I’d like to extend a huge thank you to my friend, AbeNaws, for providing me with a small server from Linode for this tutorial. The server specs are as follows:
1
2
3
- 1 CPU Core
- 25 GB Storage
- 1 GB RAM
Linode throwed me some error, so i can’t recommend it for now.
Let’s begin.
Prerequisites
First, we need to install Docker on our Linux Server with the following command:
1
sudo apt install docker.io python3
Hardware setup
We can now start with generating our keys. Let’s head over to the Github Repo from MatthewKuKanich and download the generate_keys.py file.
Run the command with python3 generate_keys.py and answer the questions.

If you get an error, install the
cryptographydepency withpip3 install cryptography.
Server Setup
With docker installed we create a new docker network
1
docker network create mh-network
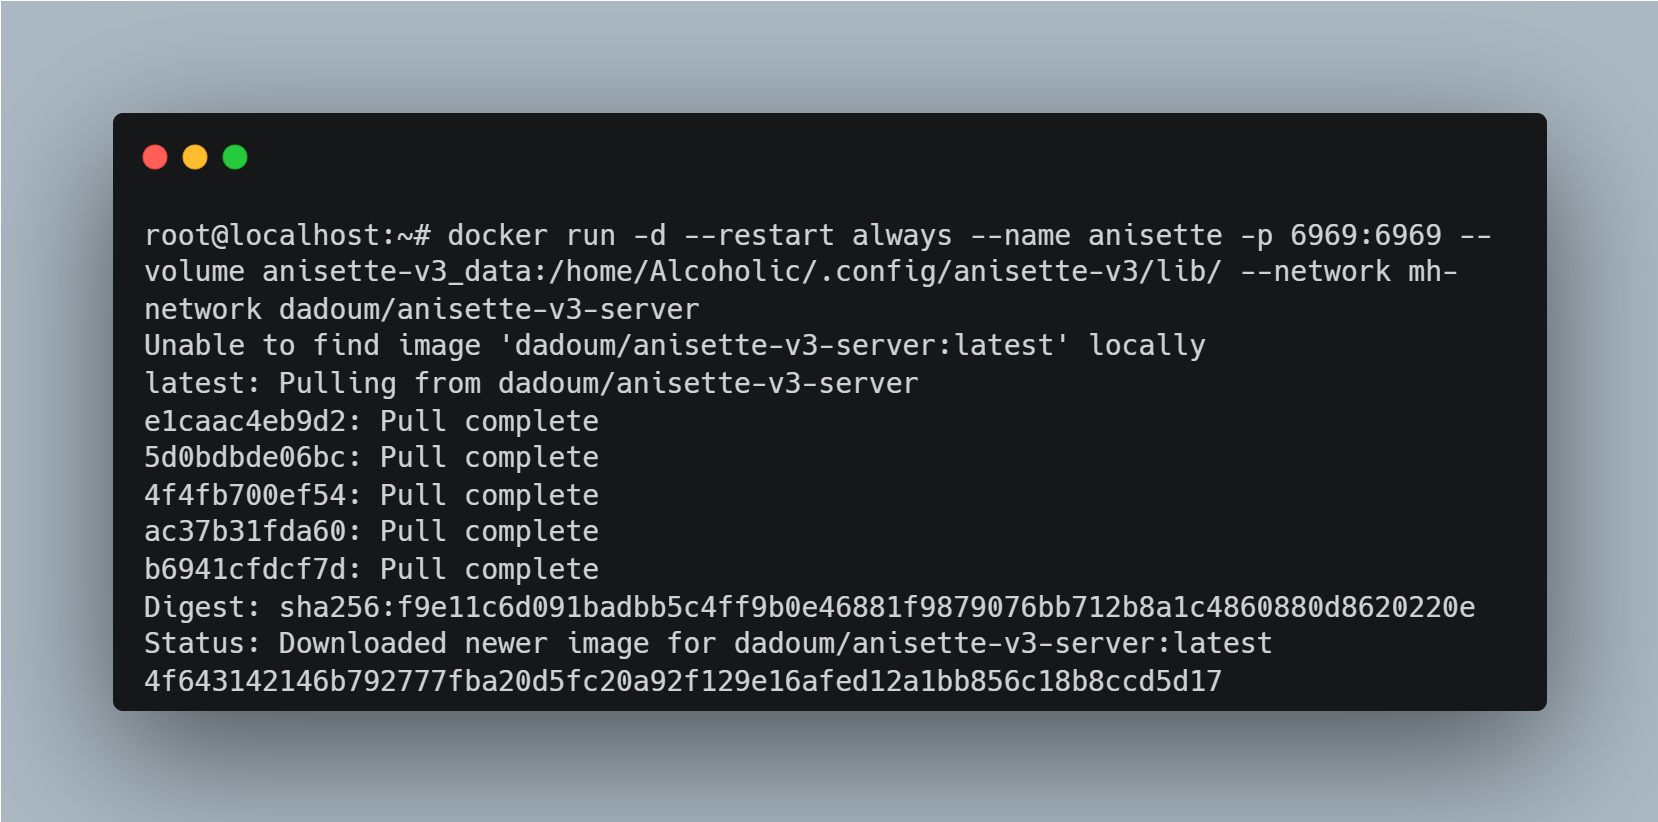
Then we will install the Anisette Server with this command:
1
docker run -d --restart always --name anisette -p 6969:6969 --volume anisette-v3_data:/home/Alcoholic/.config/anisette-v3/lib/ --network mh-network dadoum/anisette-v3-server
Start and setup the Macless Haystack endpoint in interactive mode:
1
docker run -it --restart unless-stopped --name macless-haystack -p 6176:6176 --volume mh_data:/app/endpoint/data --network mh-network christld/macless-haystack
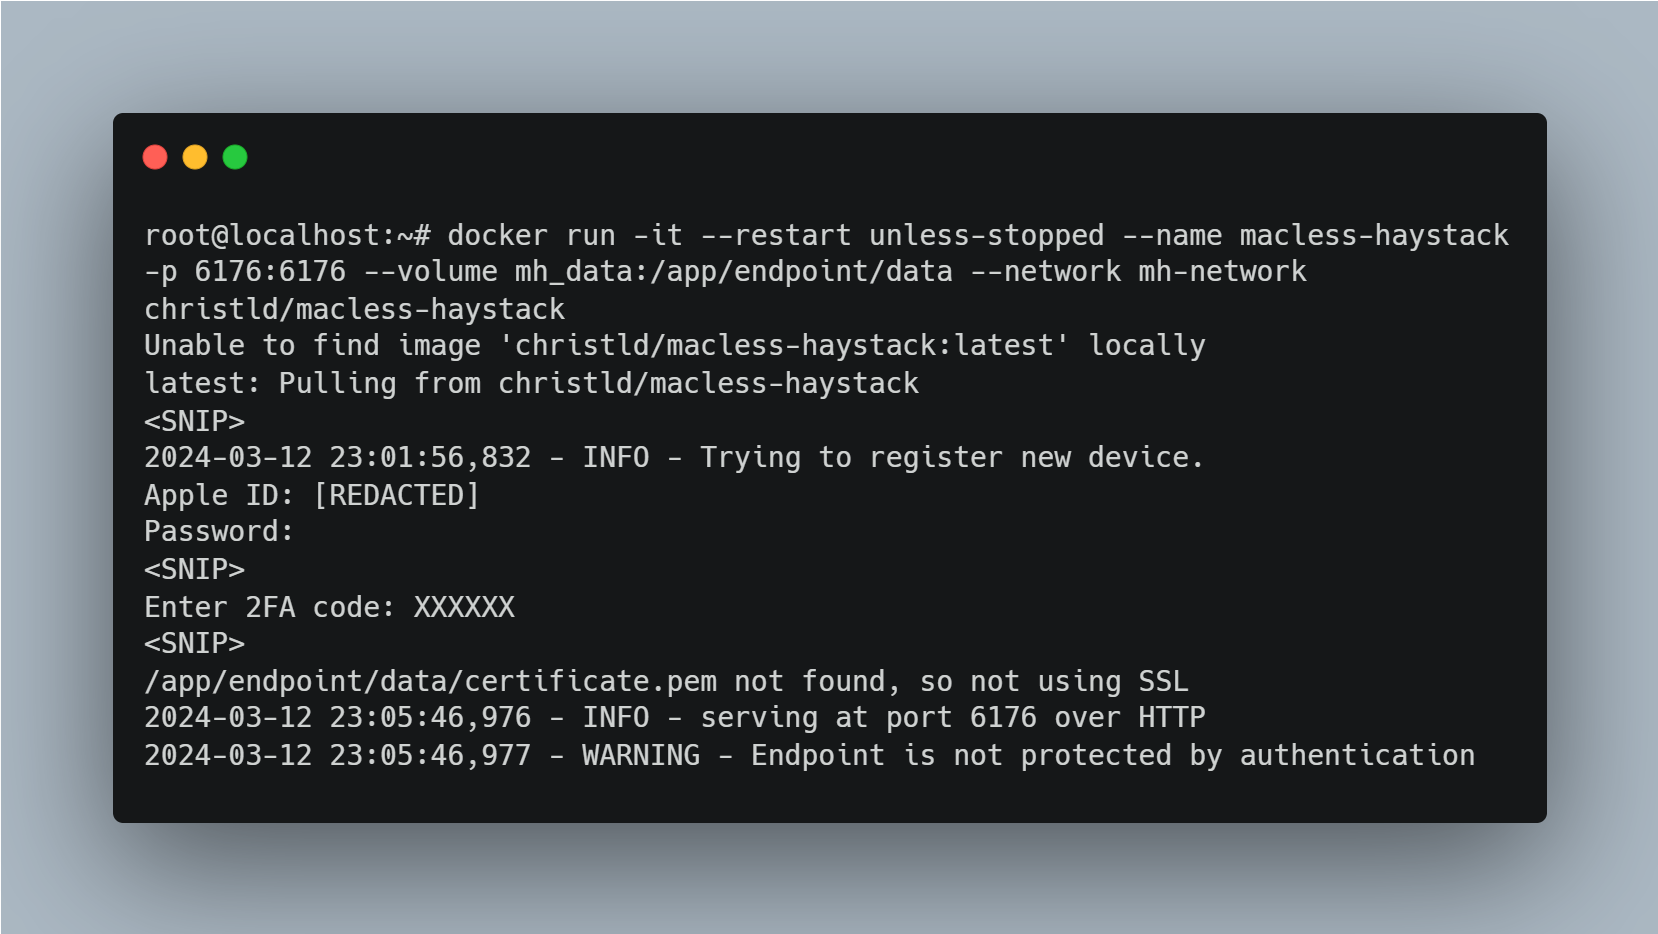
You will be asked for your Apple ID and the your Password. Make sure that you have 2FA enabled since you will also need it. Once you can see
serving at port 6176 over HTTPyou have all setup correctly.
Finally, restart the server in background by using a different terminal window
1
docker restart macless-haystack
Frontend setup
You can either use the pre hosted one on Github pages or host it on your own.You can find the webapplication here: Webapplication.zip.
If you need to adjust the Macless Haystack endpoint, click on the gear icon on the top right corner and change the URL.
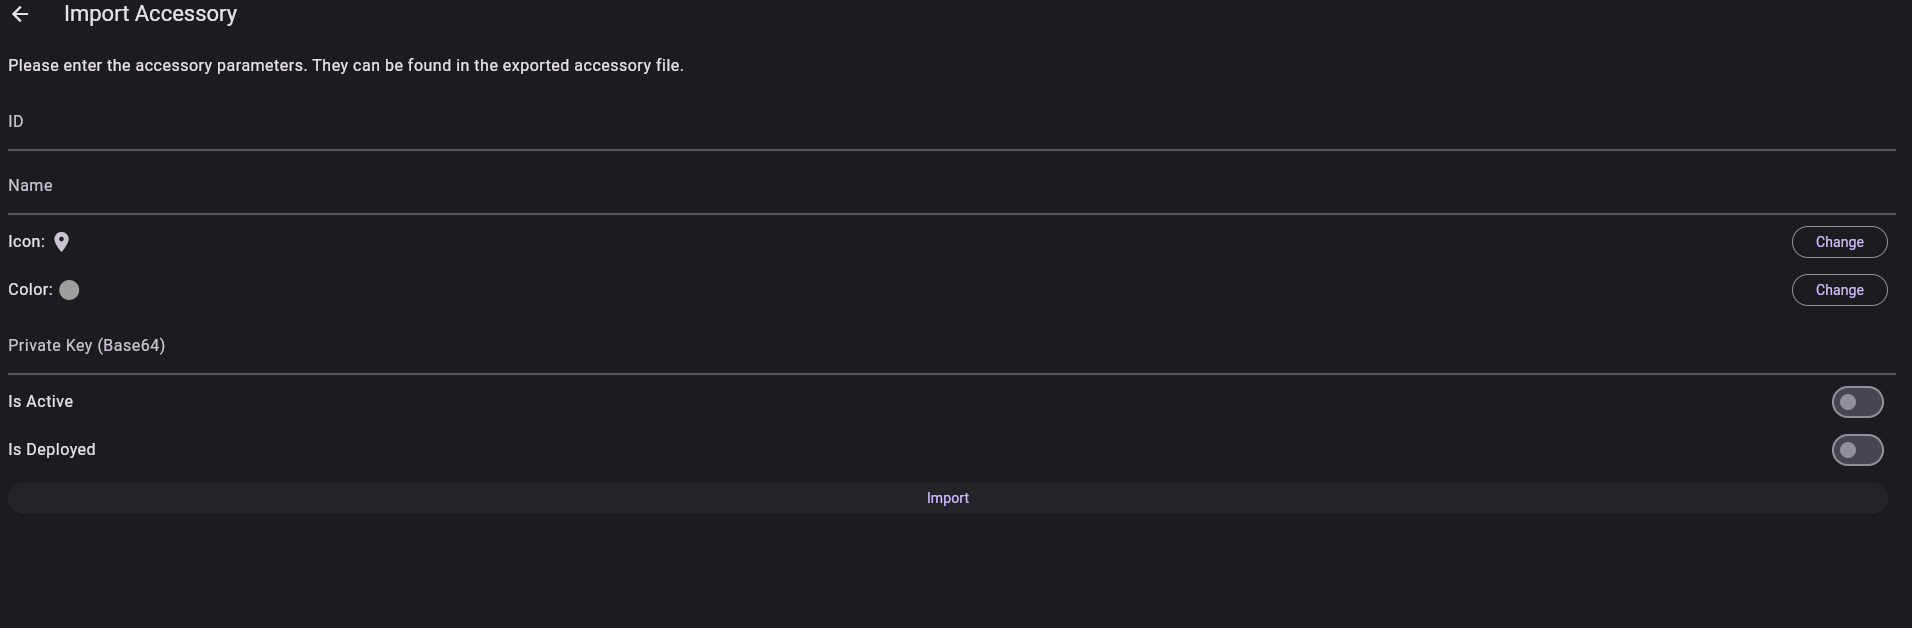
To add a Flipper, click on the Accessories tab and select the + sign. Click import Accessory and paste the private key from the .keys file. The ID can be any number you want, as long as its unique for yourself.
adding the .keys file
To import the .keys file, plug in your flipper zero and go to the files browser. Now upload the .keys file to the apps_data/findmy folder.
Questions?
If you have any questions, please feel free to either contact me via X or on Discord. My name is Mickhat. Please make also sure to join the Discord of the Momentum Firmware